The Nektar Panorama P1 is a powerful control surface with exciting potential for extended control with Mixcraft 10. The v1.0 script for this control surface has the faders page set up with some extra features. First, let's go over how to connect your Panorama P1 with Mixcraft 10.5.
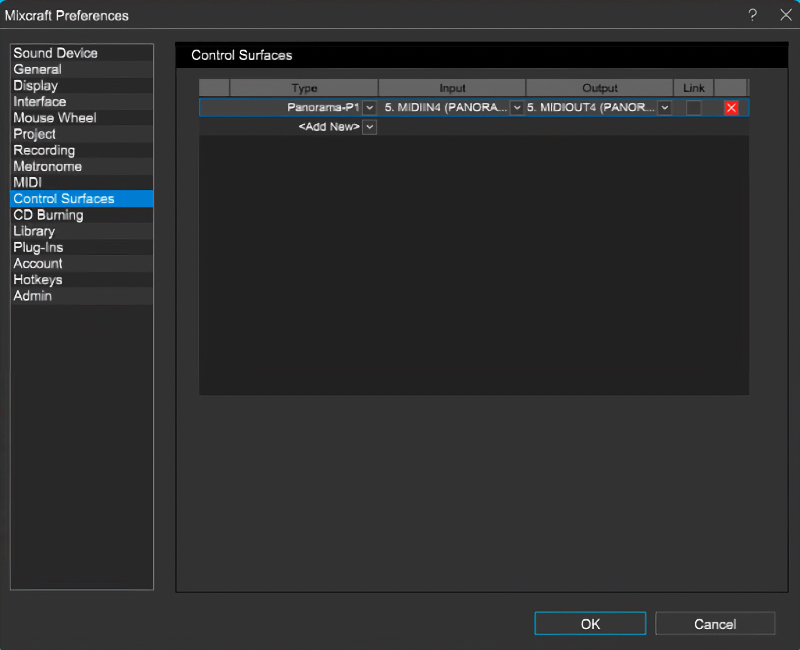
To load the controller script, open File > Preferences and select Control Surfaces from the left-hand side. In the Control Surfaces window, select Panorama-P1 as the Type, MIDIIN4 (PANORAMA P1) as the Input, and MIDIOUT4 (PANORAMA P1) as the Output. Once those have been set, click OK.

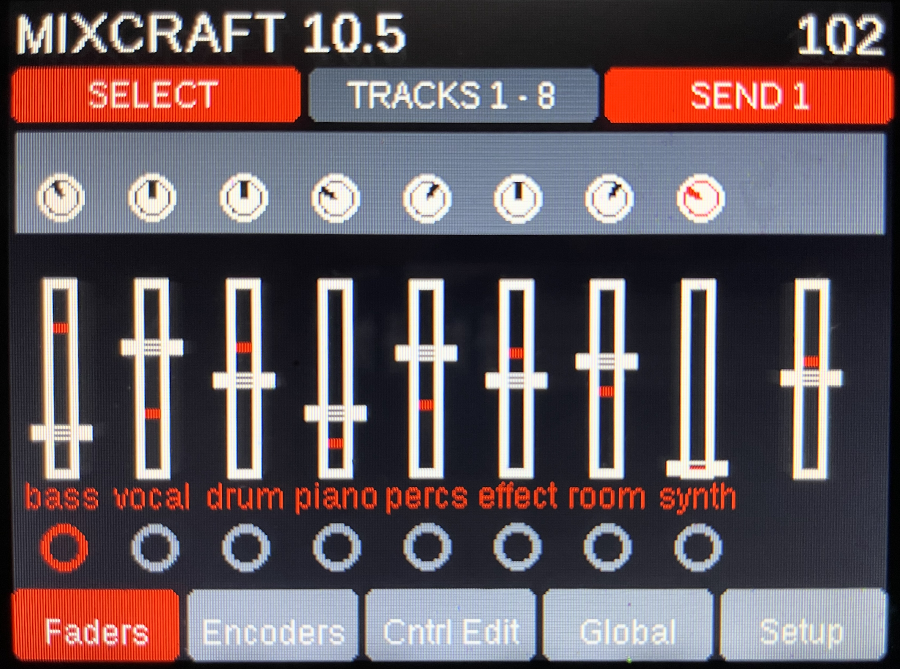
Once loaded successfully, the screen on your Panorama P1 should appear with Mixcraft 10.5 on the screen, as shown below. If it doesn't load as expected but all of the ports are set correctly, ensure that you have the Nekatr P1 drivers installed on your system. Lastly, you can try unplugging and replugging the P1 to reinitiate the communications between Mixcraft and the controller.

Now, let's go over a few operational points.
The first eight faders control track volume and will correspond with the active bank of faders, which is indicated in the grey section of the title bar (between the two red sections). By default, it will load TRACKS 1-8. You can navigate the bank of faders by eight or one track at a time. To move the fader bank by eight, press the Track - or Track + buttons. To move the fader bank by one track at a time, hold the Shift button down while pressing the Track - or Track + buttons.
Additionally, you can zoom in and out on the timeline (horizontally) by pressing Shift + Patch - or Shift + Patch +.
The last fader is fixed to the Master fader in Mixcraft. Generally, there's no reason to change your master level from 0, but it's there in case you need it!
Each fader has a button below it. By default, it is in SELECT mode, as shown in the first red section of the title bar on the Panorama P1 screen. Pressing the Toggle/Mute button below the Master fader will cycle through the modes of those buttons below the faders. The available modes are SELECT, ARM, MUTE, and SOLO. The LED for each button will indicate the state of the channel for each mode.
Each fader has a rotary encoder knob above it. This will act as a pan control for the corresponding track in Mixcraft.
The bank of eight rotary encoders above the pan encoders is used for channel sends. If your project has no send tracks, the third red section of the title bar will say NO SENDS. Otherwise, it will indicate the current active send. By clicking the Toggle/View button, you can cycle through the available sends in your project.
The transport controls are wired up as you may expect them:
Loop (F6) - toggles selection in loop mode
Back (F7) - seeks backward in the timeline
Forward (F8) - seeks forward in the timeline
Stop (F9) - stops playback
Play (F10) - toggles play and stop (pressing while playing stops playback)
Record (F11) - toggles record
Seek to Start (F1) - sets playhead back to the top of the timeline
Seek to End (F2) - sets playhead to end of timeline
Undo (F3) - one step back in undo history
Click (F4) - toggle the metronome state