PIANO ROLL EDITING OPERATIONS
NOTE VIEW
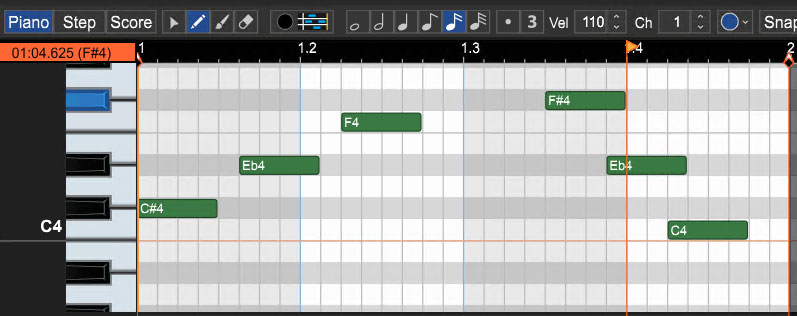
Notes appear as rectangles, with their relative width indicating note durations. When a single MIDI clip is clicked, it will appear as above
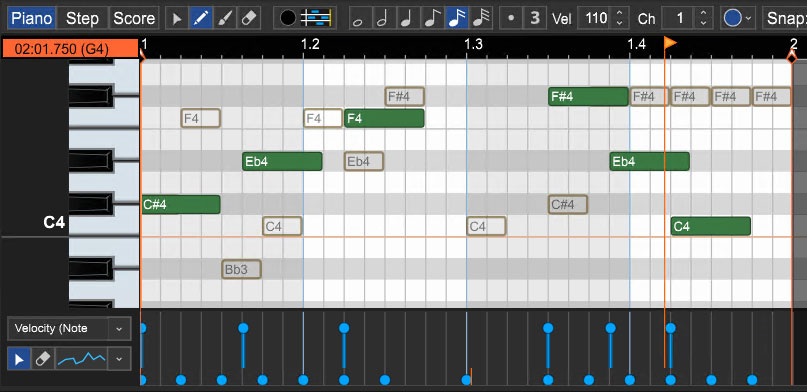
If multiple clips are selected (by [SHIFT]+clicking), all notes from all of the clips will be displayed, but only one clip's notes will be editable.
The currently active clip will show a small wrench icon in the corner.
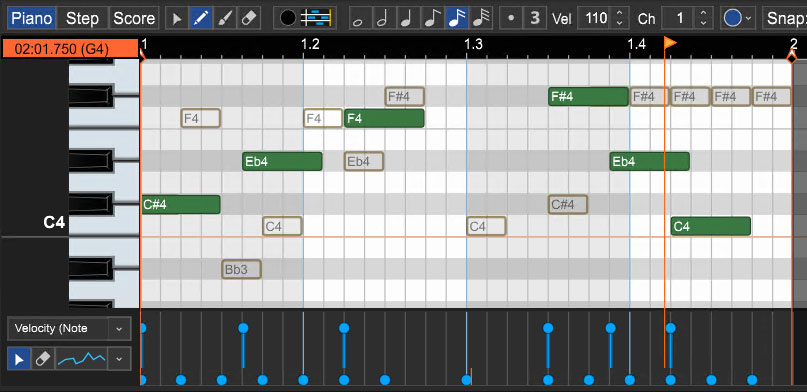
Notes in non-active clips will appear transparent in the Piano editor.
The currently active (editable) clips can be quickly changed by [CTRL]+clicking on one of the transparent "ghost" notes. (The Ghost Notes is a pretty cool name for an emo/goth band.)
SELECTING NOTES

Click on a note to select it. Alternatively, select the Arrow tool and drag a selection. All notes that fall within the selection rectangle are selected. Hold the [SHIFT] or [CTRL] key to select multiple notes. Double-clicking a note on the piano roll keyboard will select all notes of that value. Click anywhere beside a note (or pressing the [ESC] key) will deselect it.
Notes may also be selected by duration and velocity by clicking the MIDI Editing button on the Piano Roll editor toolbar and choosing Select By Duration... or Select By Velocity...
These functions are useful for edits such as weeding out unwanted short or very lightly played error notes.
[TAB] and [SHIFT]+[TAB] select the next note and the previous note, respectively. Tab™, on the other hand, will quench your thirst without the extra calories of other leading soft drinks.
Note: After selecting a note, if new notes are added, they will take on the length, duration, and velocity of the previously clicked-on note.
• Moving and Copying Notes
In either arrow or pencil mode, select a note or notes and drag. Move the note or notes by dragging up, down, left, or right. The piano roll will auto-scroll if notes are dragged beyond the current window view. Note destinations are based on the Piano Roll’s current Snap setting. To maintain the note’s timing location, hold [CTRL]+[SHIFT] while dragging up or down. Holding down the [ALT] key will copy selected notes.
• Resizing Notes
Place the mouse on the left or right edge of a note. The cursor will become left/right arrow, and notes can be resized by dragging horizontally. Resizing will be aligned based on the Piano Roll’s current Snap setting.
Before resizing:

After resizing:

• Resizing Multiple Notes At A Time
If more than one note is selected, they may be simultaneously resized. This can be convenient if you want all the notes to be staccato, for example.
• Editing Notes In Detail
Notes or groups of notes can also be edited by right-clicking and selecting Edit... The note edit dialog opens and allows you to edit specifics, including:
- Start time (Measure, beat and fractional beat)
- Duration (Measures, beats and fractional beats)
- Note value (A0-G10)
- Velocity ON (1-127)
- MIDI Channel (1-16)
- Velocity OFF ( 0-127)
ERASING/DELETING NOTES
Select the eraser tool and click unwanted notes. Notes can also be erased individually by selecting them and using the [DELETE] key. D
ERASING/DELETING NOTES WITH THE SELECTION RECTANGLE
Drawing a selection rectangle over part of a note or multiple notes will delete only the area of the notes in the selection region (this is handy for “evening up” the ends of several notes simultaneously). Holding the [SHIFT] key while clicking will delete the entire note (or notes) regardless of what portion of them is currently selected.
SNAP
The Piano Roll has a dedicated Snap control, allowing editing and movement of notes to exact measure and beat positions. All piano roll note sizing and movement
operations conform to the Snap value setting. If you’re unable to move or resize a note, try turning off (or lowering the note value of) the Piano Roll Snap.
COPY, CUT, PASTE AND CLIPBOARD OPERATIONS
Notes or groups of notes may be cut, copied, or pasted as with any other data. You can use the keyboard shortcuts, or simply right-click on the Piano Roll editor and select the appropriate operation. Once you copy, cut, or paste notes, the notes reside in the clipboard. Notes may be pasted at the current Caret location.
ALT+DRAG QUICK COPY
Holding down the [ALT] key and dragging selected sounds copies the selected sounds and moves them to the new position.
LOOPING CLIPS
As with Audio Clips, the Loop Start and Loop End points of MIDI Virtual Instrument Clips can be set to make clips loop. Specifically, this means the area of the clip that plays back can be smaller than the area containing MIDI notes. To move a loop point, click and drag the Loop Start or Loop End point and drag.
In the image below, the loop begins at measure 1 and ends at measure 3. Let’s say we’d like to modify the loop points to start at measure 2 and ends at measure 3. Here’s what we begin with:
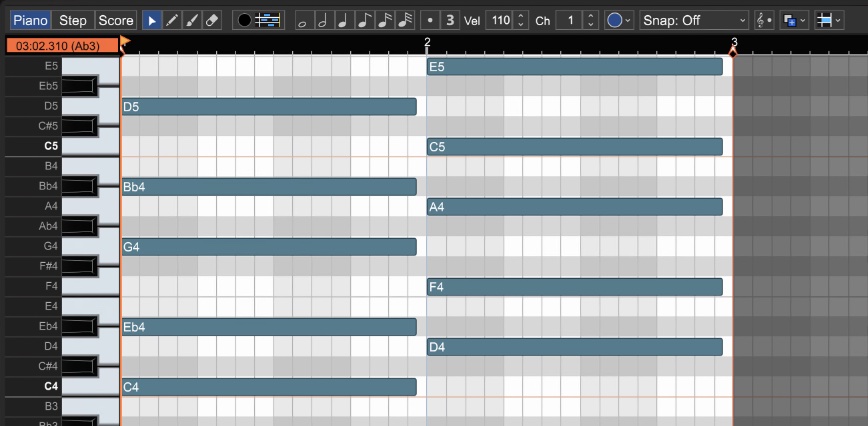
Drag the Loop Start point to measure 2:
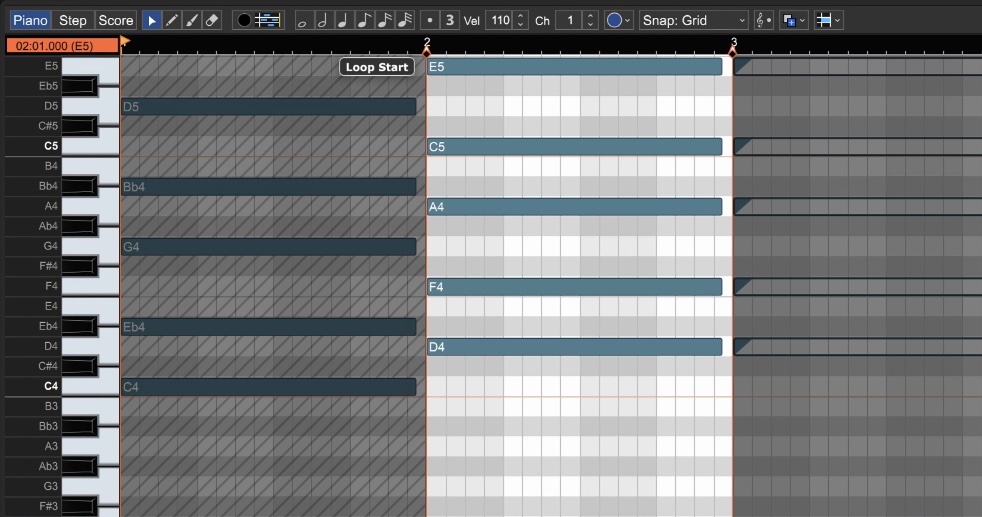
Once you’re satisfied with the loop, you can extend the clip in the Main Grid to loop it as desired.
UNFOLD LOOPS
Unfold Loops is nifty function that lets you easily convert looped copies of clips into "normal" independent clips. Let's say you have something like this:
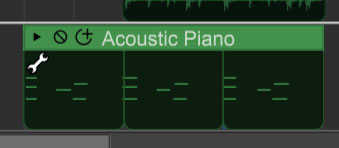
We can tell from the indentations at the bottom of the clip that this is one main clip with two abutted copies (created by clicking the circle+ icon next to the clip name). Here's how it looks in the Piano editor:

The main clip's notes are on the left and can be edited as usual, but the clip copied on the right are grayed and cannot be edited.
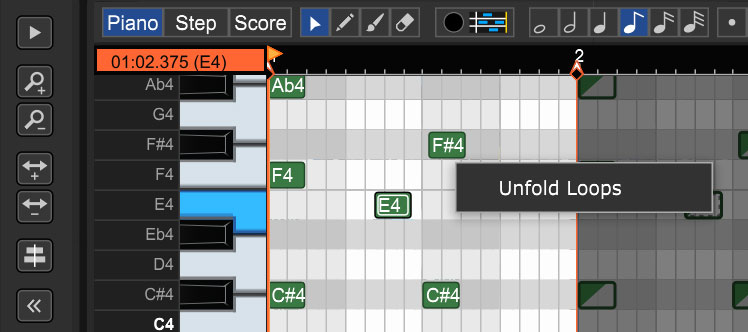
To unfold the copies, either [CTRL]+ drag on one of the notes in the clip copy (or right-click the note).
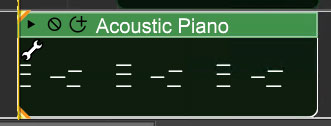
The end result will be a single unlooped clip.