
CONSTRUCTING A MUSIC LAB WITH MIXCRAFT
Educators are often faced with tough decisions when creating a computer-based music lab. Financial constraints, classroom space and availability, and curriculum limitations will inevitably influence the purchasing of equipment, the classroom setup, and the lesson plans. For educators who have no background working with music equipment or software, building a music lab can feel especially overwhelming. Researching and learning about audio equipment takes time and a great deal of patience: one can easily get lost in the sea of equipment that is readily available. This chapter attempts to rectify these issues and demystify the audio world. First, in the “Setting Up Your Music Lab” section, an overview of affordable music hardware and software is offered. Included is a selection of the common pieces of equipment that should jump start the process of turning a classroom or computer lab into a fully functioning music lab. Next, “School Environments For Your Music Lab” outlines how to configure and setup music hardware and software. For educators interested in more technical explanations, a great amount of literature is available that discusses audio equipment, recording arts, and audio production.
SETTING UP THE MUSIC LAB
SUGGESTED HARDWARE
PC Computer: Mixcraft is for PC/Windows computers only. Currently, Mixcraft version 10 is supported by 64-bit Windows 7 SP1, 8, 10 or 11. During student lessons, it would be best for each student to have a computer. If this is not possible, then the class can be divided into small groups of students who share what individual computers are available. When resources are scarce, however, at a bare minimum, having one central PC and projector run by the educator will suffice for many lessons, especially for those recording projects that include the entire classroom.
Computer Audio Drivers/Sound Device: PC computers have built in “audio drivers” that enable communication between software applications and the computer’s sound card. For the lowest possible latency and solid audio performance, WaveRT mode is often the best choice. However, WaveRT is only available in Windows 7, and Windows 8. ASIO drivers will typically give the best possible performance, but these drivers are generally available only with professional audio interfaces. Finally, Wave mode is available on all versions of Windows and works with nearly all audio hardware, but it generally suffers from very high latency.
Projector/Projection Screen: It might be necessary for educators to walk students through lesson plans step-by-step. Using a projector and projection screen during classroom projects will accomplish this instruction need. A mobile projector on a cart is appropriate when using shared classroom space because it allows educators to easily set up or tear down.
Microphones: Educators looking to record student solo or group performances might need to use a microphone. There are many resources available that explain microphone types, setup, positioning, and microphone care. For classroom purposes, investing in an affordable condenser microphone (around $100 USD) or a USB microphone will suffice for most student projects.
Audio/Computer Interface: In short, an audio/computer interface is a device that converts an incoming audio signal into a digital signal that is recognizable by a computer. This conversion allows engineers to use an audio software equipped computer to record musicians. In addition to supporting audio, some interfaces also support MIDI.
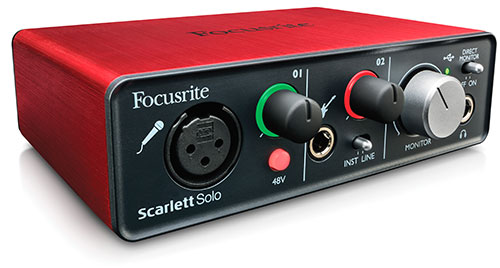
Audio/computer interface devices require little set up, generally plugging directly into a computer’s USB slot. Shop around and look for devices that fit the budget of the classroom. Also keep in mind how the device will be used in the classroom. Will the class be recording more than one or two tracks simultaneously? Will MIDI instruments be used? Depending on the physical setup or budget of the class, either buy one device for a main teaching computer or buy smaller devices suitable for each individual computer station (having both set ups would be best). Mixcraft is compatible with all PC-based audio/computer interfaces.
Instruments: A music curriculum often requires the recording of acoustic or electronic instruments. Acoustic instruments such as acoustic guitars, drums, string, brass, wind, or percussive instruments are typically “miked” or recorded with a microphone. Electronic instruments, ranging from electric guitars, synthesizers, or drum machines, are typically recorded directly through an audio cable that can be plugged into an audio/computer interface. Mixcraft is capable of recording all acoustic and electronic instruments.
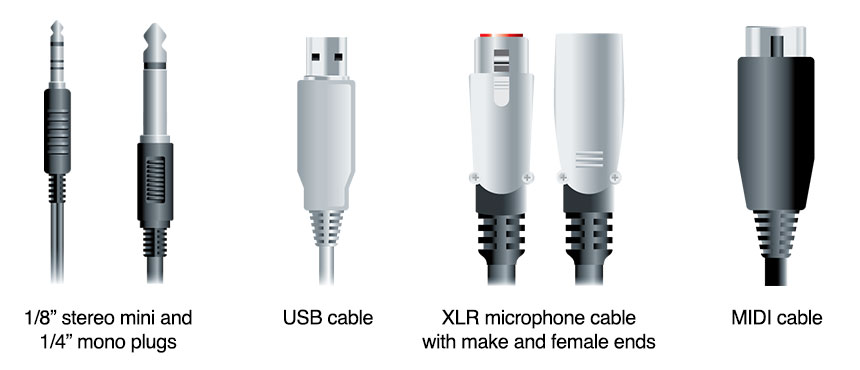
Instrument and Microphone Cables: Whether for recording with an external microphone or with an instrument itself, it is important to purchase the right audio cables.
Microphones generally use an XLR cable; electronic instruments normally use a ¼” audio cable. Finally, a MIDI instrument to Mixcraft hookup usually requires a MIDI cable. Much like socks in the washer, cords tend to disappear, so do not hesitate to purchase a couple of extras!
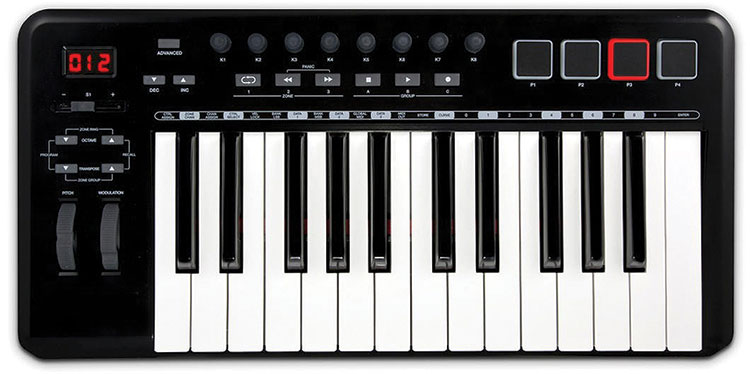
MIDI Controller: MIDI Controllers are devices that normally use a keyboard interface to control virtual instruments or other external hardware. These devices work well in a classroom setting to control and perform with Mixcraft’s virtual instruments. For example, a student performing with a MIDI keyboard device can actually “play” Mixcraft’s Organ Instrument. MIDI Controllers vary widely in price range, but a small, reliable MIDI keyboard can be purchased for around $100.
Monitors or Headphones: It will be important to monitor class recordings and Mixcraft sessions. For student computer stations, it would be ideal to have one pair of headphones per computer station. For educator stations, a decent pair of monitor speakers will allow the whole class to hear the current Mixcraft project.
MIXCRAFT’S BUILT-IN VIRTUAL INSTRUMENTS AND EFFECTS PLUGINS
Mixcraft Built-in Virtual Instruments: Mixcraft bundled a variety of built-in, “soft” or virtual instruments with their software. These instruments range from software replications of classic organs, electric pianos, synthesizers and to even drum sets! Educators and students can create these sounds using Mixcraft without owning or recording any of the actual instruments. Simply launch Mixcraft and load up an instrument on Mixcraft’s virtual instrument tracks. Though it’s not required, a hardware USB/MIDI controller (i.e., a piano-style keyboard) works best when performing with virtual instruments.
Mixcraft Loops: Mixcraft 10 comes bundled with over 7500 professionally produced loops. Mixcraft loops are segments of prerecorded and edited audio that spread across a range of different sounds and instruments. Loops include drum beats, guitar chord progressions, keyboard parts, and even world music instruments! The lesson plans included in this manual address how to use these loops for student projects. An internet connection will be necessary to download loops on demand.
SCHOOL ENVIRONMENTS FOR A MUSIC LAB
The layout and construction of a music lab depends on either classroom size or on access to a computer lab. With these specific restrictions in mind, three common setups of a music lab in a school environment will handle most situations. For educators whose only option is to transform their home classroom into a music lab, the “One Teacher, One Computer, One Projector” layout works well. Educators, however, who have access to a computer lab, will make set-up choices based on whether the lab is for music exclusively or is a shared, general use facility.
In this setup, a designated PC is used to run Mixcraft. An audio/computer interface is connected to the PC through USB or Thunderbolt protocols and acts as a liaison for MIDI instruments, electronic instruments, and microphones. Situated at the front of the classroom is a projector and projector screen that shows the main PC’s screen to students. Alongside the screen are two monitor speakers that play back audio from the Mixcraft session.
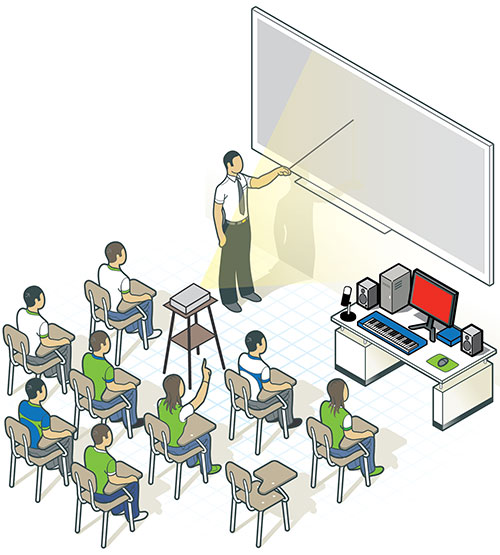
SINGLE CLASSROOM SETUPS
One Teacher
One Computer
One Projector
When an educator does not have access to a computer lab or extra classroom, the basic setup of a computer, projector, and monitor speakers will be sufficient to create an in-house music lab.
REQUIRED MATERIALS
PC Computer
Mixcraft
Projector/Projection Screen
Computer Speakers
RECOMMENDED MATERIALS
Audio/Computer Interface
USB/MIDI Controller
Monitor Speakers
USB Microphone
Interactive White Board
Discussion: Depending on the layout of the classroom, it is important to keep in mind how students will engage with lesson plans and Mixcraft. For instance, students should be able to see the educator’s computer screen clearly: coupling a main computer with a projector and projection screen will allow a classroom of students to follow a handout or lesson plan easily. This approach might also be effective in familiarizing students with the basics of audio software, running simple lesson plans, or orchestrating class-sized projects. One drawback of such a setup, however, is that only one student or teacher at a time will be able to use Mixcraft. Nevertheless, for class-sized lesson plans where the educator oversees the use of audio hardware with Mixcraft for such projects as Rap Improvisation or STOMP, this arrangement is ideal.
MUSIC STATION SETUPS
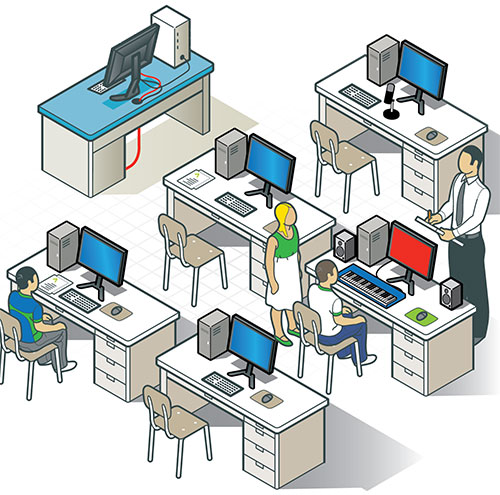
1) The Shared Computer Lab
Schools will have one main computer lab shared by multiple educators and classes. A shared computer lab can be divided into small, computer booths (aka, “stations”) that are outfitted with audio hardware and software. In this setting, students will be able to work independently or in small groups to complete assignments. For educators with access to a shared computer lab, remember to allow ample time to set up and clean up the classroom.
REQUIRED MATERIALS:
PC Computers
Mixcraft
Computer Speakers or Headphones
RECOMMENDED MATERIALS:
Audio/Computer Interfaces
USB/MIDIControllers
Monitor Speakers or headphones
Microphones, USB Microphones, or Instruments
Interactive White Board
Discussion: For smaller projects, such as the Mixlibs Project or Vocal FX Project, this setup is ideal. If classroom space allows, having a portable projector and projection screen at the front of the computer lab will help the educator facilitate and oversee the lesson. Remember, because this is a shared space, it’s often best to set up the lab before class starts to maximize lesson time (particularly if the selected lesson involves musical instruments and other music gear).
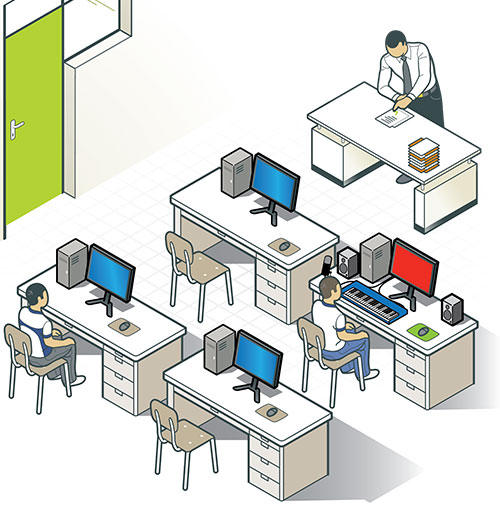
2) The Music Computer Lab
In some school environments, an entire computer lab might be dedicated to audio recording and production. As with the shared computer lab, “music stations” would constitute the majority of the music computer lab space. A larger workstation for the educator could include, but not be limited to, a mixing board, projector, and projection screen. Since the mixing board can record multiple instruments simultaneously (ideal for student group performances) and can monitor the volume output from each music station, the teacher can control all the student work from one central station. Incorporating other music equipment into this setup – for example a hardware compressor, EQs, or a variety of instruments – might be useful.
REQUIRED MATERIALS:
PC Computers
Mixcraft
Computer Speakers or Headphones
RECOMMENDED MATERIALS:
Audio/Computer Interfaces
MIDI Controllers
Monitor Speakers or headphones
Microphones, USB Microphones, or Instruments
Mixer
Projector and Projection Screen
Interactive White Board
Discussion: The music computer lab setup will be the most resource exhausting of the three lab types covered. Nevertheless, a fully equipped music lab is ideal for handling the widest variety of audio projects, from recording solo singers or voice actors to larger music projects, such as student jazz quartets, rock bands, and world music ensembles. Larger student projects would certainly benefit from such a setup, specifically the Remix and Lyrical Songwriting projects.
In this setup, the audio/computer interface is the focal point of all recording and monitoring. Attached to the PC through USB ports, the interface should have a headphone jack, audio inputs for microphones, and inputs for electronic instruments. Students should be familiarized, prior to recording or monitoring their music, to the model and functions of the audio/computer interface. Additional capabilities on the interface may include analog in and outs for monitors and MIDI in and outs for other MIDI devices.
FURTHER READING
There are many setup options for creating a music lab. If the above suggestions are not possible, seeking out other literature will help cultivate alternatives. The “For Dummies” book series is a great place to start; the language is directed towards the layperson and the content is thorough. Creating a solid music lab is no easy task; the process should not be rushed!
Strong, J. Home Recording For Musicians For Dummies.
Strong, J. PC Recording Studios For Dummies.
Eargle, J. Eargle’s The Microphone Book.