STUDENT’S GUIDE | |
FILM SCORING PROJECT | |
NAME: | |
CLASS TIME: | |
PERIOD: | |
TEACHER: | |
CLASS: |
REQUIRED MATERIALS:
Computer with Mixcraft
Video to be set to music
Music Video Student Guides (Additional Materials Download)
SUGGESTED MATERIALS:
Mixcraft Loops & Virtual Instruments
Samples Movies (Additional Materials Download)
Further Reading Materials
FILM SCORING PROJECT STUDENT’S GUIDE
CLASS TIME:
NAME:
PERIOD:
TEACHER:
CLASS:
ACTIVITY
Shooting The Film
First, ask your teacher whether you will be writing a short or a long film. Is the project a joint effort with a film class? What equipment will be used? Finally, ask is there a particular topic or theme that must be included in the film.
Write a script of the film. Once the script is completed, have your teacher and review it.
Begin filming. Film each scene independently. Be aware of shot angles and whether dialogue is being recorded.
When the scenes are finished, rip the recorded video onto a computer. Digital cameras use SD cards, a memory storage device that makes ripping easy. If possible, rip the video into .AVI or .WMV format.
Edit the film if needed. For advanced edits, use film-editing software. For standard edits, Mixcraft’s video functions can be used.
SCORING THE FILM
Launch Mixcraft and open File>Set Project Default Settings. In the New Project window, enable the Video Track checkbox and set the Audio Tracks to 4, then click OK. Now click File>New Project.
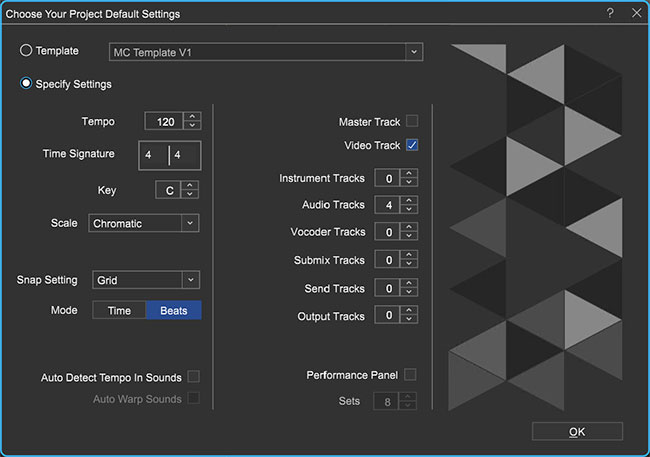 Once the New Project window has loaded, remove any instrument tracks, check the Video Track field and set the Audio Tracks field to 4.
Import the video file. From the top menu select Video > Add A Video File > Select the target video file. Currently, Mixcraft only supports .AVI, WMV, and MP4 file types.
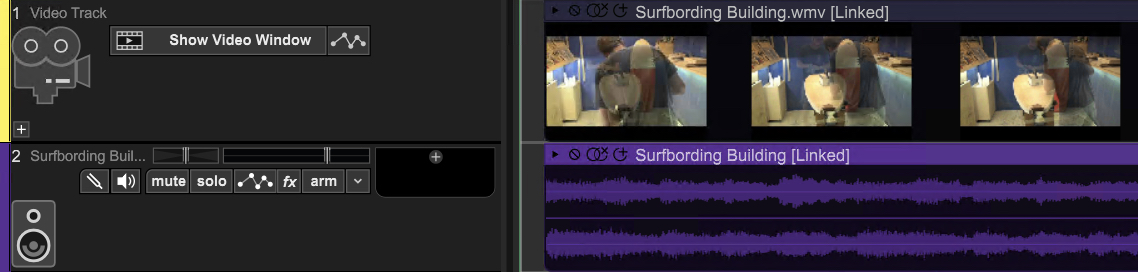 A video imported into Mixcraft. Both the video frames and audio is imported.
Delete any unnecessary music or sound effects that might accompany the video. To do this, first you have to unlink the audio and video tracks. Left-click-hold and sweep-select the video and audio tracks. Release. Now, on either of the tracks: right click > Link > Unlink Selected Tracks. The tracks will now be unlinked. You can now right-click on the unwanted audio track and select “delete.” Be careful not to delete any dialogue or audio sounds that need to be retained!
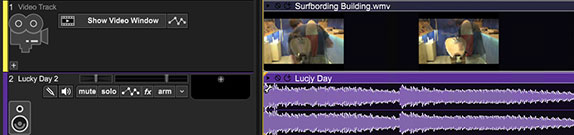 The imported audio track was deleted and a new audio track was loaded in its place.
Play and watch the video in Mixcraft. Encourage students to note important events or sequences that might benefit from the addition of music. Below are suggestions:
Contemplate the mood of the video. Is the scene happy, sad, or suspenseful?
Note any scene changes or transitions.
Note places in which characters exchange dialogue.
Be on the lookout for certain actions or events that take place (i.e. a plate being dropped, a knife chopping a head of lettuce).
Setting a master tempo. After watching the video and taking notes, decide whether the musical accompaniment should be fast or slow: Slow and sustained music for an intimate or dreary scene; or fast paced, suspenseful music for an action-packed scene. Should the music change tempo: bad guys suddenly crash a romantic, candle-lit dinner. Adjust the master tempo to fit the mood of the video (for a fast tempo try setting 140 – 160 BPM, for a slow tempo try setting 75 – 90 BPM).
Begin Composing. Composing the music is up to you. Below are three suggestions to get started. Experiment with one approach or combine several to create the score. Remember, focus on being creative and working with the film:
Using Mixcraft’s Loops
Mixcraft’s loop library is an excellent starting place and a quick way to build a score. First, select a drum or percussion loop and loop it throughout the duration of the video. Next, begin to introduce instrumental parts. A bass line or a loop of chords makes an excellent starting place. Finish the score off by adding sound effects.
Using Mixcraft’s Virtual Instruments
You can compose original melodies by using Mixcraft’s virtual instruments. Such an approach might be used to capture specific moods: compose in a minor key for bleak or tense scenes or a major key for happy and joyful scenes. First, add a virtual instrument track to Mixcraft. Select the keyboard icon to launch the virtual instrument browser. Select from the available virtual instruments and record a part using a MIDI controller, musical typing, or by programming MIDI with the pencil tool.
 An “A Minor” scale, often used by composers to portray sadness or suspense.
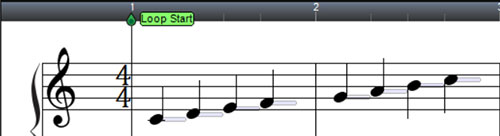 A “C Major” scale often used by composers to portray joyful or carefree moods.
Create personal recordings of music or sound effects
Finally, try composing and performing original music for the score. Depending on the subject of your film, of course, acoustic instrumental music or a capella parts could certainly be considered. Additionally, recorded sound effects or noises from the environment can give an earthy or mundane reality to the film. Freesound.org is a rich source of thousands of searchable sound effects, directly accessible via Mixcraft’s integrated Freesound.org browser.
To access the Freesound.org library, click the Library tab at the bottom of Mixcraft’s Main Window (note that the computer must be online).
 Once the Library tab is selected, click the Freesound.org button to view and search sounds.
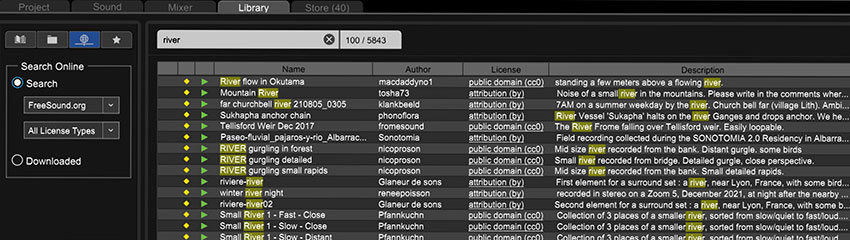 Mixcraft’s Freesound.org online sample browsing window.
Start arranging loops, recorded audio, or sound effects on Mixcraft’s Timeline. It is important to align the music or sound effects with the film on the Timeline. For example, lining up a “crash” sound with a shot of a plate breaking be impactful to the audience.
FINISHING THE FILM
Start arranging loops, recorded audio, or sound effects on each of their Mixcraft tracks. It is important to align the music or sound effects with the appropriate areas of the film track. Use the Timeline. For example, a properly placed “crash” sound will serve to heighten the emotional impact of a shot where a plate shatters.
Adding text. When the music is completed and the film is edited, consider adding a title and credits to the film:
Adding a movie title: To add a title to the film, select the text feature from the top menu > Video > Add text…
 Selecting the text option in Mixcraft allows users to add text to films.
Next, type the movie title in the text box.
Adding credits: Credits will need to use scrolling text. First, select the “add scrolling text…” feature from the top menu > Video > Add Scrolling text…
Selecting the text option in Mixcraft allows users to add text to films.
Type the credits into the text box.
Finally, arrange the text regions on Timeline. Place the movie title region near the beginning of the film. Place the credit regions near the end of the film.
 Here, the text region for the title is moved to the beginning of the video.
Mixing down. When the film is completed it is time to mix down the session into a video file. From the top menu, select File > Mix Down To > AVI, WMV, or MP4 video format